How to Set a Domain Name to IIS(Internet Information Server) on Windows Server?
Set a Domain Name to IIS – Steps as follows
Now you are ready to set domain name manually from your Windows Server IIS. You can follow these steps to add a domain:
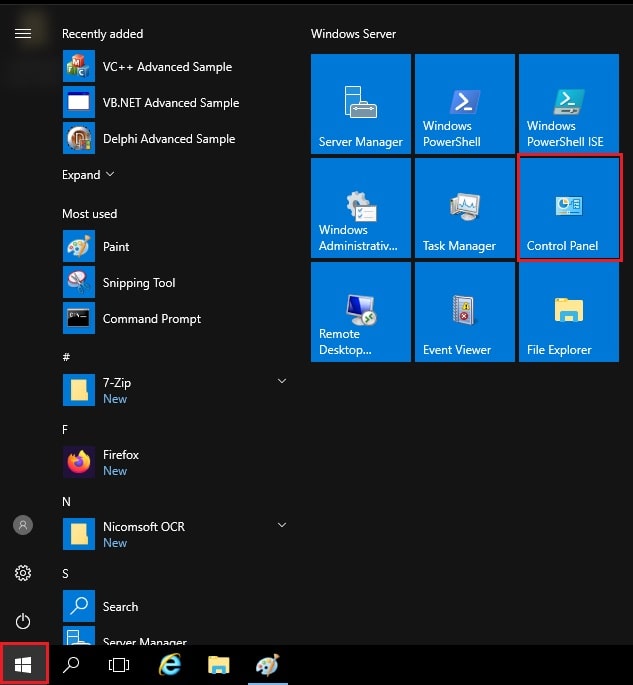
1. Click on the Windows icon on the desktop and then click on Control Panel.
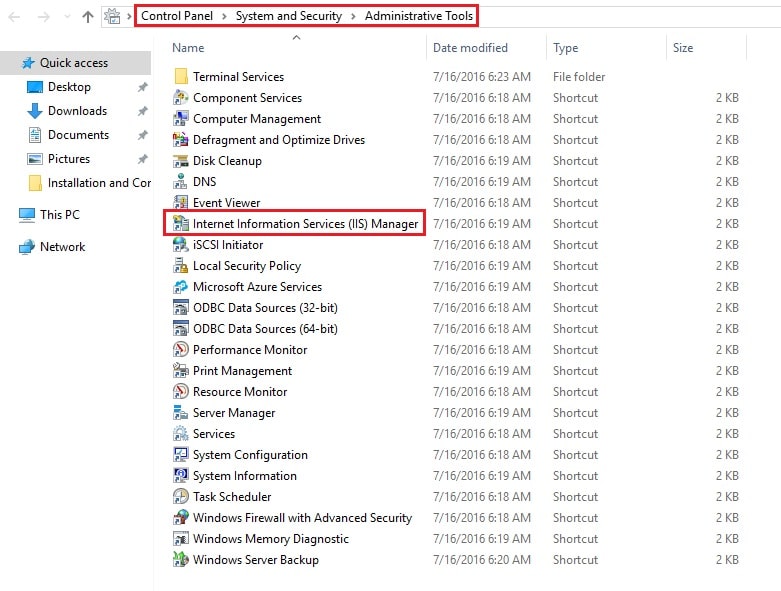
2. Under Adjust your computer’s settings, click on System and Security. Next click on Administrative Tools and double-click on Internet Information Services (IIS) Manager.
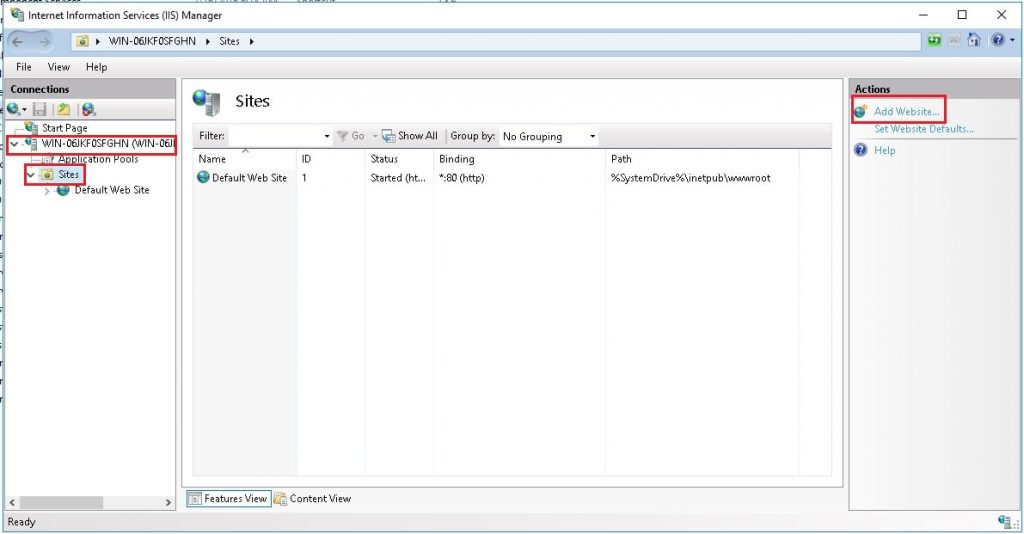
3. Double-click on your server name, go to Sites and from the top-right hand-side corner, under Actions click on Add Website.
4. An Add Website window will get displayed as shown below:
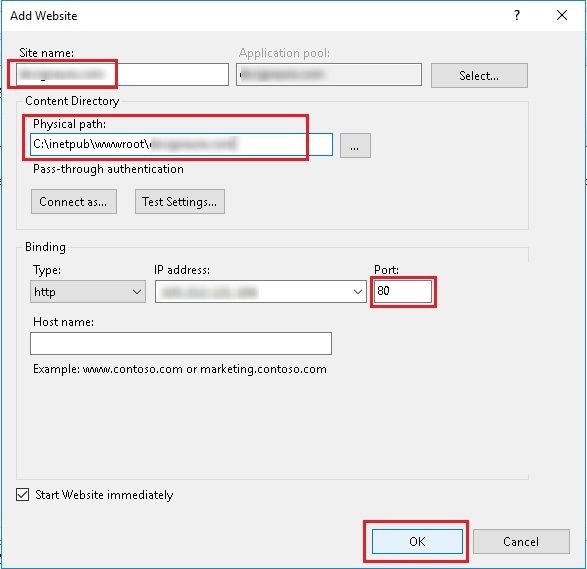
- Enter your domain name.
- Set the Physical path by browsing the site file that usually lies in inetpub folder.
- Select the Type and IP address fields to use for this website, set TCP Port = 80, Hostname, leave it blank if this is dedicated IP otherwise enter “www.yourdomain.com”.
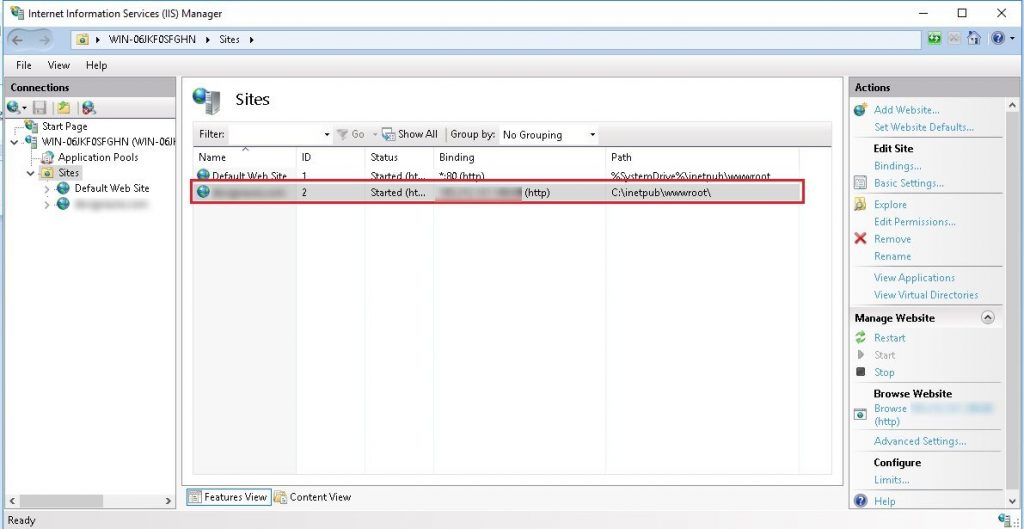
- Click OK and the website will start automatically as below:
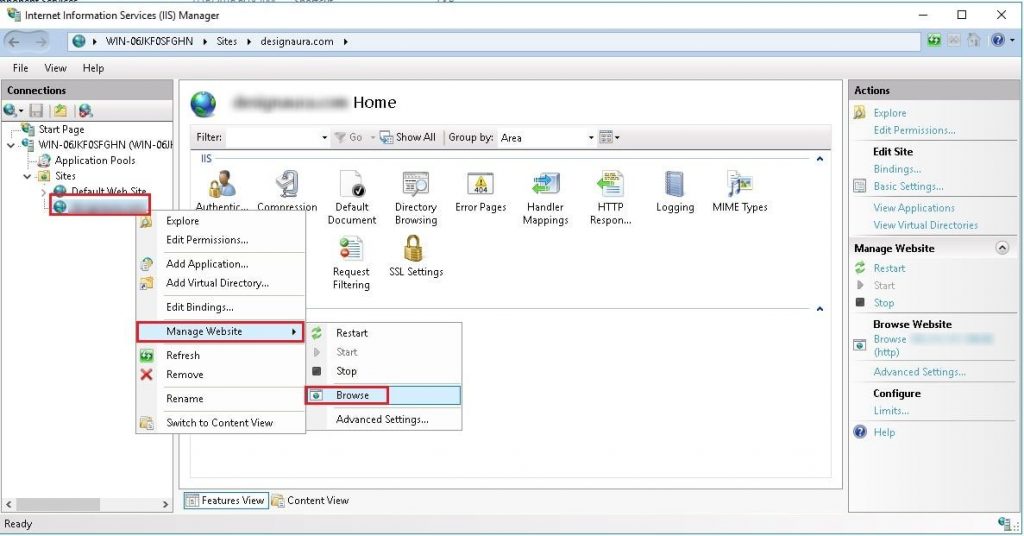
5. For testing your website, right click on your domain -> Manage Website -> Browse. Your website will get displayed.
In this way, you can set a domain name to IIS on Windows Server.