How to create DBs on Windows Server?

Creating databases on a Windows Server can be accomplished using various database management systems (DBMS), such as Microsoft SQL Server, MySQL, or PostgreSQL. Below, I’ll guide you through the process of creating databases using Microsoft SQL Server, which is one of the most commonly used DBMS on Windows Server.
How to create DBs on Windows Server – Creating a Database on Windows Server Using Microsoft SQL Server
How to create DBs on Windows Server – Step 1: Install Microsoft SQL Server
1. Download SQL Server:
- Visit the Microsoft SQL Server download page and download the appropriate version of SQL Server for your needs.
2. Run the Installer:
- Launch the SQL Server installation file and follow the on-screen instructions.
- Choose the New SQL Server stand-alone installation option.
3. Installation Type:
- Select the Evaluation or Developer edition, or enter your product key if you have one.
4. License Terms:
- Accept the license terms and click Next.
5. Feature Selection:
- Select the SQL Server features you need. For basic database creation, you need at least the Database Engine Services.
- Click Next.
6. Instance Configuration:
- Choose a Default instance or Named instance. A default instance is typically easier for new users.
- Click Next.
7. Server Configuration:
- Set the SQL Server Database Engine to run under the desired Windows account. The default is usually fine.
- Click Next.
8. Database Engine Configuration:
- Choose the authentication mode. For simplicity, you can use Windows authentication mode, but if you need to access the server remotely, you might prefer Mixed mode (SQL Server and Windows Authentication).
- Specify SQL Server administrators. Add your current Windows user if not already listed.
- Click Next and then Install.
How to create DBs on Windows Server – Step 2: Install SQL Server Management Studio (SSMS)
1. Download SSMS:
- Visit the SQL Server Management Studio (SSMS) download page and download the latest version of SSMS.
2. Install SSMS:
- Run the SSMS installer and follow the installation steps. The default options are usually sufficient.
How to create DBs on Windows Server – Step 3: Create a Database Using SSMS
1. Open SSMS:
- Launch SQL Server Management Studio.
2. Connect to the SQL Server Instance:
- In the Connect to Server dialog, select your server name and the authentication method you configured during installation.
- Click Connect.
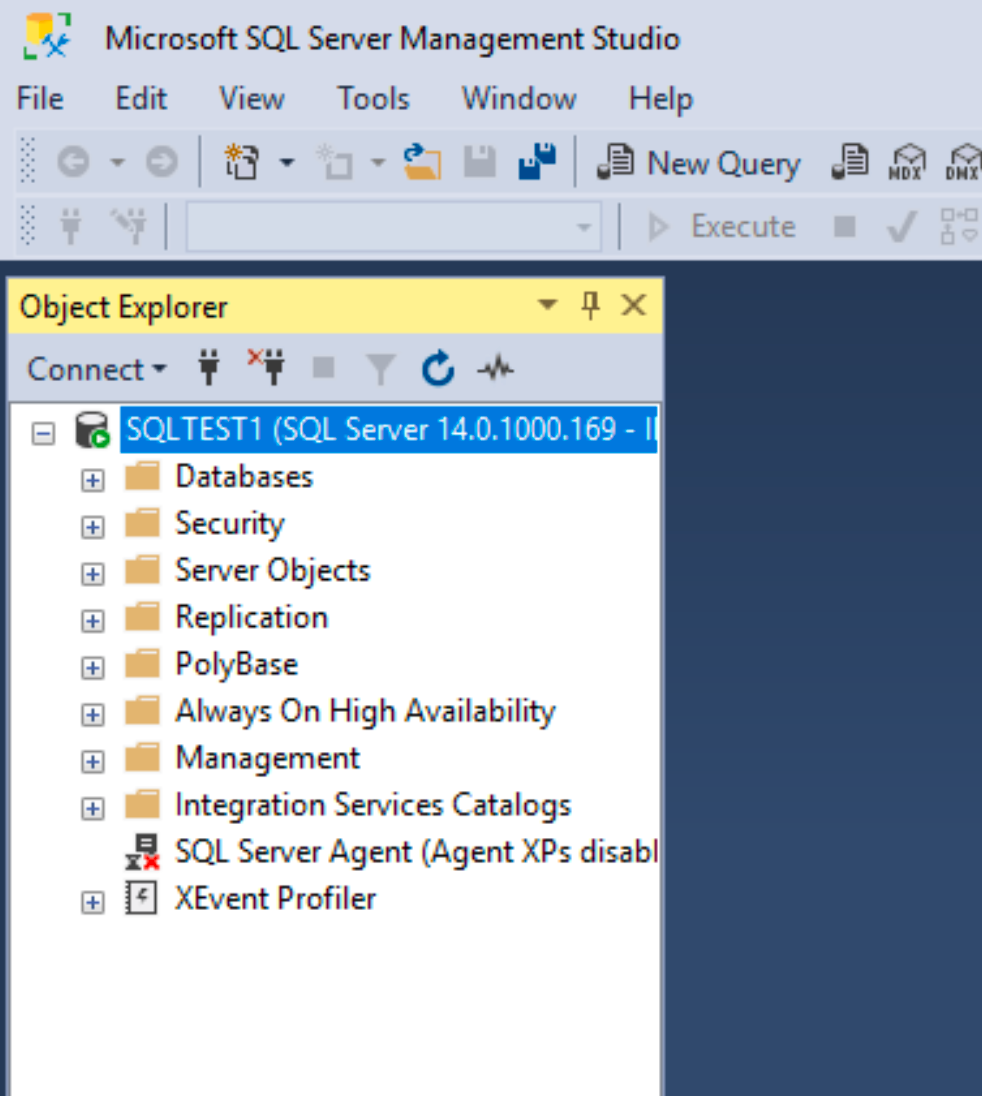
3. Create a New Database:
- In the Object Explorer, right-click on the Databases folder and select New Database.
- In the New Database dialog, enter a name for your database in the Database name field.
- Click OK to create the database.
4. Verify the Database Creation:
- Expand the Databases folder in the Object Explorer to see your new database listed.
Additional DBMS Options on Windows Server
If you prefer other DBMS, here are brief instructions for MySQL and PostgreSQL:
Creating a Database Using MySQL
1. Install MySQL:
- Download MySQL Installer from the MySQL website.
- Run the installer and follow the instructions to install MySQL Server.
2. Install MySQL Workbench:
- You can install MySQL Workbench using the same MySQL Installer.
3. Create a Database:
- Open MySQL Workbench.
- Connect to your MySQL server instance.
- Right-click on the Schemas section and select Create Schema.
- Enter the name of your database and click Apply.
Creating a Database Using PostgreSQL
1. Install PostgreSQL:
- Download PostgreSQL from the PostgreSQL website.
- Run the installer and follow the instructions to install PostgreSQL.
2. Install pgAdmin:
- pgAdmin is typically included with the PostgreSQL installer.
3. Create a Database:
- Open pgAdmin.
- Connect to your PostgreSQL server instance.
- Right-click on the Databases section and select Create > Database.
- Enter the name of your database and click Save.
By following these steps, you can easily create and manage databases on a Windows Server using your preferred DBMS.